Amazing product photography is the key increasing your eCommerce sales. If you’re confident in what you’re selling, your customers will be confident in what they’re buying. It might seem complicated at first, but product photography is a lot of fun and it’s surprisingly easy. Here are 7 tips to help you take better photos and increase your sales.
1. Shoot against a white backdrop
Shooting against a white backdrop is the secret to beautiful product photos. The white will reflect light back onto your product and give you a well-lit image with bright and realistic colors.
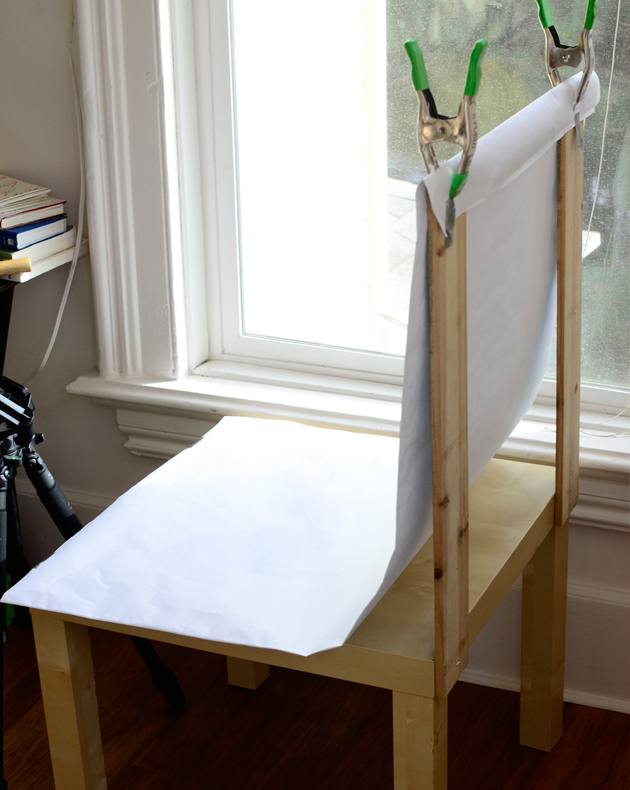
The best kind of white backdrop is a sweep, which is where the vertical surface seamlessly transitions (or ‘sweeps’) down to the horizontal surface. The easiest way to do this is to build your own DIY shooting table. You’ll need a table, two scrap pieces of wood (about 2ft tall), spring clamps and material for the sweep. You can use anything clean and white – white wrapping paper works wonders because of its reflective properties.
The best thing about building a shooting table is that it gives you a lot of freedom and flexibility in terms of where you set up. If you need a larger backdrop, you’ll need to improvise and attach a white sheet to something. Alternatively, you can buy a professional photography sweep with a stand, which will save you a lot of time setting up if you plan on shooting frequently.
2. Set up near a window
Natural lighting is easy to use, affordable and a lot less fiddly than artificial lighting. The trick is to use it indirectly, so your best option is to set up near a window, with the window on the left or right of the product.
3. Use a fill light or reflector
As you will only have light coming in from one side, you will need to even out the lighting and shadows on the other side. You can do this with a reflector, or by folding a piece of white card (the more reflective and shiny the better) in half to create a fill light. You might need to play around with the angles.
If your products are looking over-exposed, try diffusing the light by covering the window with white paper or a white sheet. Alternatively, try moving the setup further away from the light source, or shooting at a different time of day.
4. Take photos from different angles
Visitors to your eCommerce store are more likely to buy a product if they can clearly visualise it. Providing photos from different angles is an easy way to improve your customer’s online shopping experience.
Visitors to your eCommerce store are more likely to buy a product if they can clearly visualise it. Providing photos from different angles is an easy way to improve your customer’s online shopping experience.
5. Provide close-ups
Provide a close-up or two of any special features, patterns, or textures. Even if you have a zoom function enabled, providing close-ups shows the customer where they should be looking.
Provide a close-up or two of any special features, patterns, or textures. Even if you have a zoom function enabled, providing close-ups shows the customer where they should be looking.
6. Remove the background
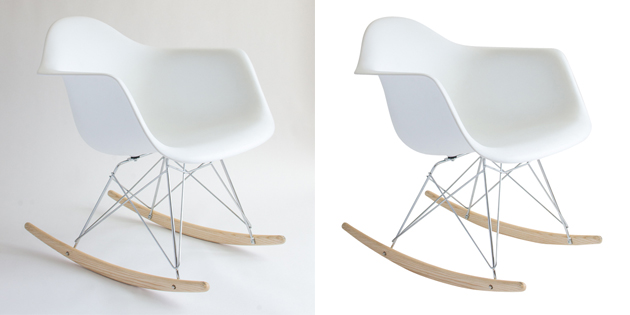
Let your products do the talking by placing them on a clean, white background. This will draw attention to what you’re selling and give your online store a professional look.
Let your products do the talking by placing them on a clean, white background. This will draw attention to what you’re selling and give your online store a professional look.
7. Crop your images the right way
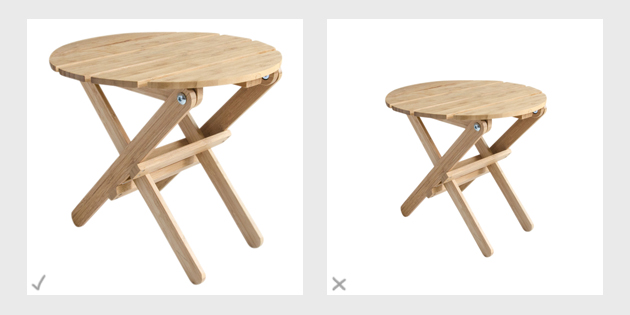
As a general rule, all of your products must be centered and should take up 80-90% of the canvas. It might look as though there isn’t enough white space around the product when you view them in a photo-editing software, but remember that a lot of time padding and margins will be added when publishing on your site.
As a general rule, all of your products must be centered and should take up 80-90% of the canvas. It might look as though there isn’t enough white space around the product when you view them in a photo-editing software, but remember that a lot of time padding and margins will be added when publishing on your site.
So before you neglect your product images, give these 7 tips a go and watch as the quality of your product images increases.
 Holly Cardew Holly is the founder of Pixc, a professional product image editing service. She has experience building and running online stores and growing a large social media following.


